

- Penetesting Industry 4.0 IoT Prototype – 5 - 18/04/2020
- Penetesting Industry 4.0 IoT Prototype – 4 - 18/04/2020
- Penetesting Industry 4.0 IoT Prototype – 3 - 18/04/2020
Remotely Hacking into Raspberry Pi
Step 1: Creating a TCP Tunnel
The first step to hack into any device on a different network is to create a TCP tunnel. This can be done using a freely available application called ‘ngrok’. Open https://ngrok.com/download in browser and login/signup (Refer Fig 3).

Fig 3: ngrok website
Then download the appropriate version and unzip the folder as shown below. Then copy the auth-token from the ngrok website and paste it in the terminal as shown below. (Refer Fig 4)
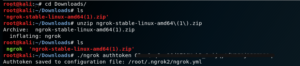
Fig 4: Extracting files from the zip file
Using the command “./ngrok” we can check all possible functions that can be done using ngrok. (Refer Fig 5) Now we create the tcp tunnel on port 1234 using ngrok.
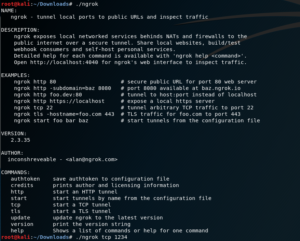
Fig 5. Tcp tunnel creation
Once this command is entered, a tcp tunnel is created. The screen looks as shown below, and displays the URL and port number for the tcp tunnel. The URL is “tcp://0.tcp.ngrok.io” and the port number is displayed in the blue box. The URL provided for ‘Web Interface’ is used to monitor the traffic on the tcp tunnel. (Refer Fig 6)
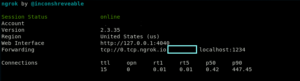
Fig 6: URL and Port for the tcp tunnel
Step 2: Creating the payload
In order to create the payload, we need to know 2 things:
First – the IP address of the host and
Second – the IP address of the URL of tcp tunnel obtained in the above step.
To find the IP address, we use the command ‘ifconfig’. The IP address is marked with the red box. (Refer Fig 7)
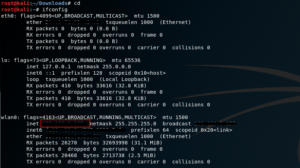
Fig 7: Ip address of the host
Now, we find the IP address of the URL for tcp tunnel using the command ‘host
![]()
Fig 8: IP address of tcp tunnel
Now that we have both the IP addresses, we will create the payload using ‘msfvenom’ an in-built command line instance of Metasploit. Metasploit is a well-known exploitation framework in Kali Linux which is used for exploiting multiple devices like android devices, windows systems, etc. (Refer Fig 9)
Fig 9: Remote Code Execution Payload
In the above command, ‘-p’ stands for payload type. Since our target device is Raspberry Pi, we have used the payload – ‘python/meterpreter/reverse_tcp’. In this payload, meterpreter is the type of shell that gets created upon the execution of this payload. In a normal Connection, a client device connects to the host device through the host device’s open port. But in a reverse connection, such as reverse_tcp, the client or victim device opens the port that connects to the host thus initiating a connection between the host and victim device that it is not blocked by the firewall. Similar reverse connection can be established via various other protocols like http, https, udp, etc. LHOST stands for the IP address of the host (attacker’s) device. In this case it corresponds to the IP address obtained in Fig 8.
LPORT stands for the port through which we want to establish the connection between the host and victim device. In this case it corresponds to the port number marked in Fig 6.
The last part of the command is the location path where we want to save the payload file. We have used the extension ‘.py’ since we wanted to create an executable python file.